
Help Centre
<
HomeYour customers know who you are. Incorporate your own branding, including colours, imagery and your logo to establish a seamless and recognisable journey through your website and into Digital Assistant.
To customise Digital Assistant, head to the navigation bar in your dashboard, select More, then click Settings and Appearance.
Here you can add your logo, update your launch button or avatar and change the text in your header as well as edit the colours of Digital Assistant.
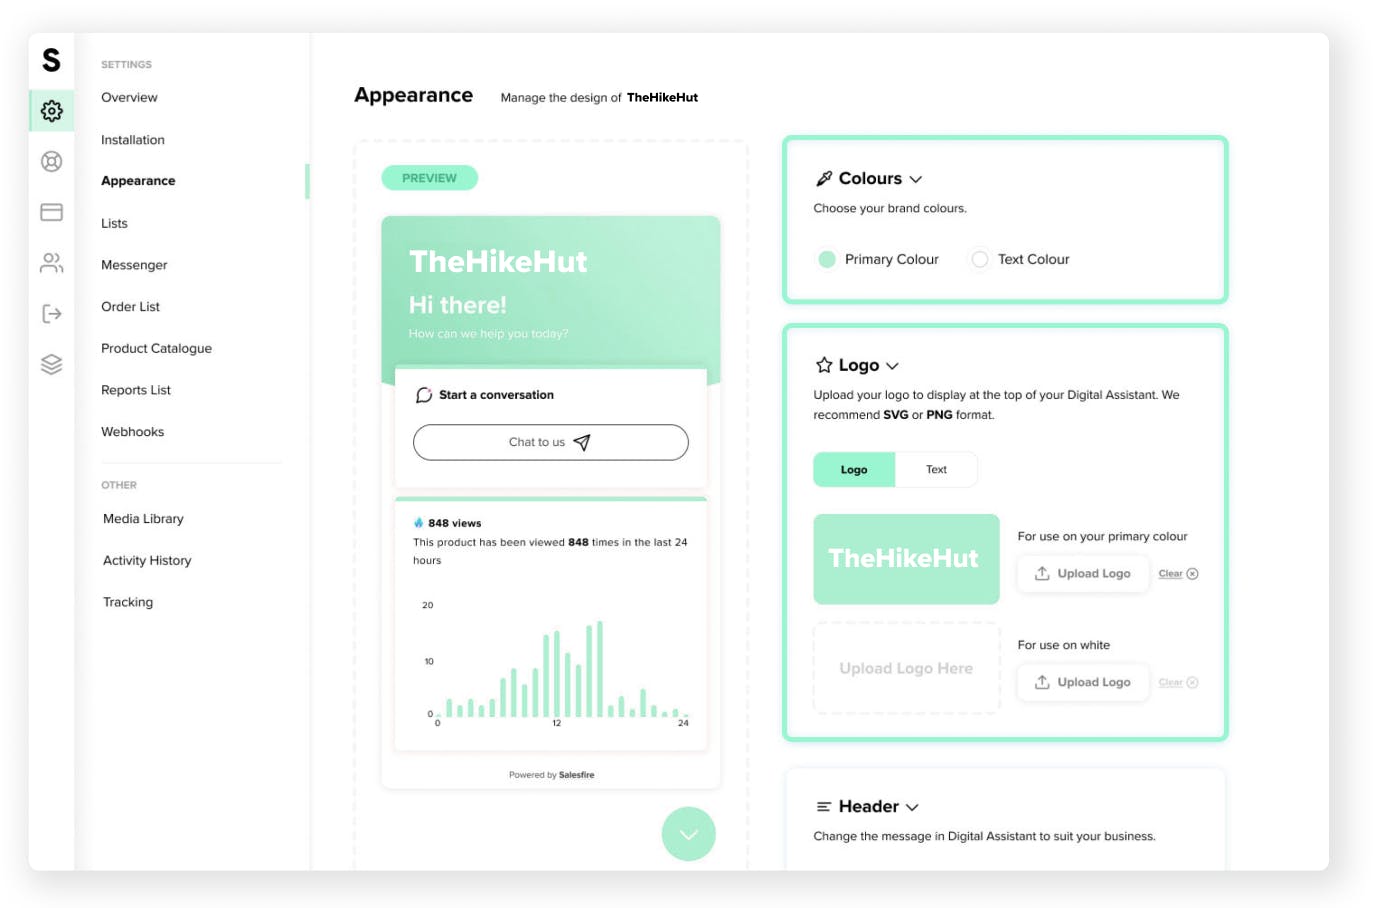
Colours and logo
To update the colours inherited throughout your campaigns and into the Digital Assistant drawer click into the Colour section. Here you can use the Primary colour option to select the main colour for Digital Assistant as well as choose a Text colour. You can also enter a custom hex code to further match your site’s branding if needed.
We also recommend uploading your company logo in the Logo section to develop familiarity with shoppers who are using Digital Assistant.
Header
You can update your header message in this section to welcome users to your site or explain Digital Assistant.
Launch button and avatar
In the Launch Button section, you can choose to use the Digital Assistant icon or upload your company logo.
You can also customise the avatar that appears with your Digital Assistant messages, whether you upload your logo or use initials.
You will see a preview of how this looks before selecting Save Settings at the top of the page to save your customisation changes.
Position
In the Position section, you can edit where the Digital Assistant launch button sits on your website. We recommend using the launch button’s default position of sitting in the bottom right of your website to follow industry standards.
Now you’re all set up and ready to launch your first Digital Assistant campaign on your website.