Help Centre
<
Home
Adding Basket Value Detection
Typically takes 1
minute
This article will provide guidance on specifying how you want to detect basket value on your website. Adding Basket Value Detection enables you to trigger campaigns based on the value in the cart on your site.
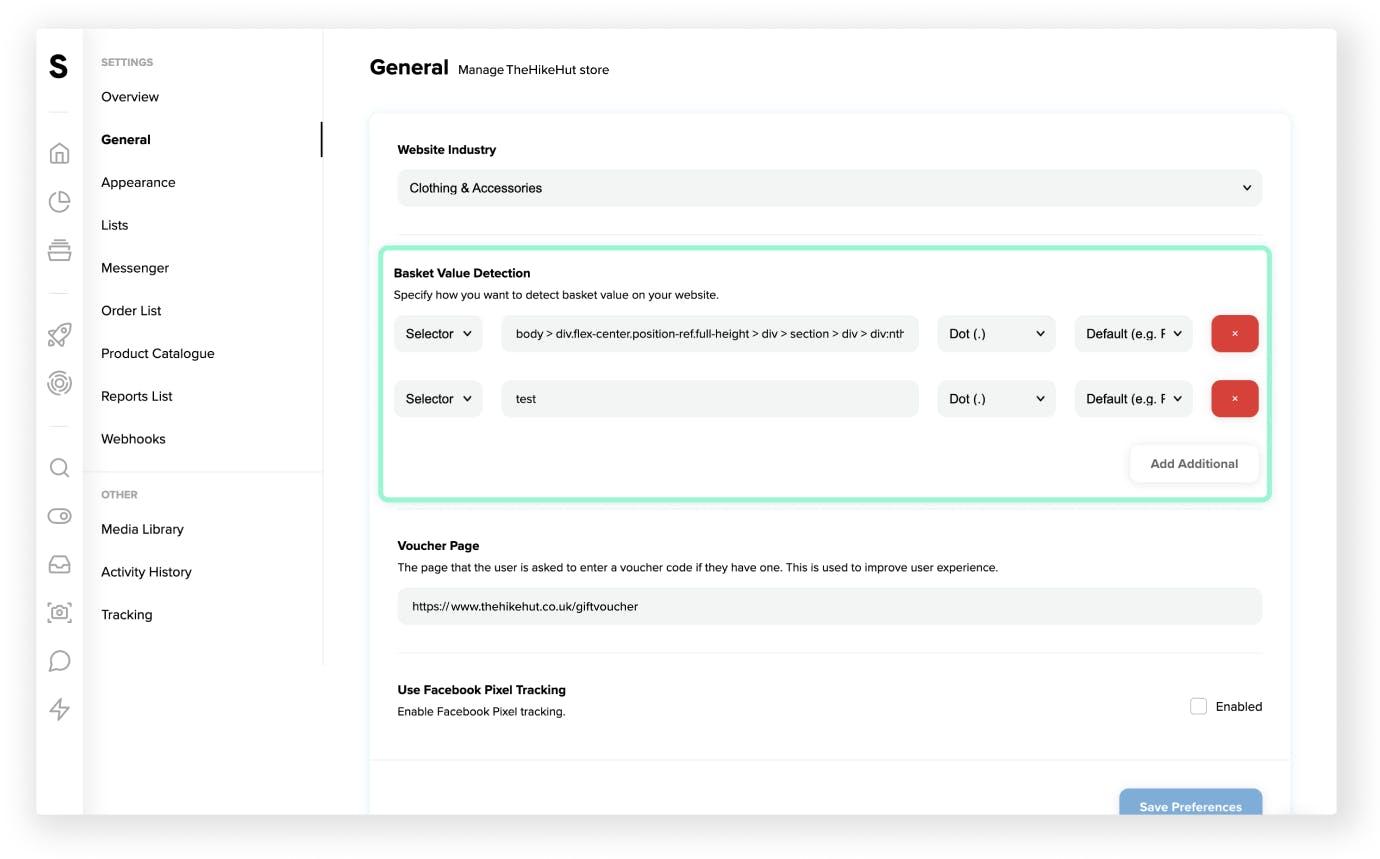
- To begin head to Settings in your Salesfire dashboard and click General.
- Here you will find the Basket Value Detection field to enter the selector for your basket value. The selector tells Salesfire how to find the basket value on a page.
- To find your selector, right-click the basket element on your website then select Inspect. This will present you with the highlighted portion of the selector to show the basket element on your site. From this section, you can then right-click the highlighted selector and choose Copy Selector to then paste it into the Basket Value Detection field.
- It is possible to add multiple selectors if you have more than one basket selector on your website. The system will look at each selector until it detects one of the selectors on the page.
A selector is a browser feature that allows websites to find certain elements on a web page.
For example, a selector may look like: #basket .total .GBP

Testing a selector
If you have a selector and you want to double-check what it’s picking up on the page we recommend the following:
- On Google Chrome head to View click Developer and then select Developer Tools.
- A new window will open from here then click the Console tab.
- Type in the following and replace SELECTOR with your selector. Do not remove the quote marks.
var sfs = 'SELECTOR';
var sfd = '.';

document.querySelectorAll(sfs).forEach(e => {
    console.log(parseFloat(
        (e.textContent || e.innerText)
            .replace(/\((?=\d+)(.*)\)/, "-$1")
            .replace(new RegExp("[^0-9-" + sfd + "]", ["g"]), '')
            .replace(sfd, '.')
    ), e);
});
It will then list the value it has found and which elements it is from.